Set up the repository
Set up the repository
Assuming you've already completed the integration, next step is to set up a repository.
You need to successfully set up and configure your repo so that Archbee can fetch the content in there and set it up nicely on our end.
You can fork this repository.
Archbee organizes the content with a config file, like this .yaml file. It reads the first config file it finds in the root of your repository, in this order: archbee.json, .archbee.json, archbee.yaml, archbee.yml, .archbee.yaml, .archbee.yml. If the root has none, Archbee looks in the docs/ folder. JSON and YAML files take the same keys.
Pay close attention to the .yaml file here if you want to configure the folder where the markdown content is rendered from (or a summary document tree hierarchy).
Create .yaml file
Create a .archbee.yaml file with the following variable structure:
Place the config file in the root of your repository. Without a config file, Archbee uses the defaults: the docs in docs/, the tree from summary.md, and the assets in assets/.
To sync more than one docs folder, add a config file to each folder. Check how to Sync multiple GitHub folders.
What do all these keys mean?
- root: ./docs : this property defines where's the directory containing the docs (can be replaced with docsPath: ./docs). The default is docs/.
- structure:
- summary: summary.md : reconstructs the document tree in the left navigation panel in Archbee. The path is relative to docsPath. If there is none, we consider the folders to be the categories and mimic the file structure inside.
- assets: assets : the folder for the images and files your docs use, relative to docsPath. Archbee leaves this folder out of the navigation tree and uploads the files your docs link to.
- docTreeOptions : the settings for OpenAPI files. See Import Open Api files.
- shadowDocs : you need to define the code files/folders to be included as Shadow docs. The paths are relative to the repository root.
- publishSpace : boolean, set to true if you want to publish the space to production portal after each commit. Archbee publishes after each sync it applies. publishSpace: true also turns auto-merge on, unless you set autoMerge.
- autoMerge : boolean. true applies each push to the tracked branch right away. false holds each push for review in Archbee. See Review incoming git changes.
- customJS, customCSS, footerTemplate, headerIncludes : the space's custom code. See Custom code & code snippets with GitHub.
Example of an archbee.yaml config file:
root: doc-api
structure:
  summary: summary.md
  assets: assets
publishSpace: true
headerIncludes:  |
  <script>
  document.getElementById("demo").innerHTML = "Hello JavaScript!";
  </script>
Example of an archbee.json config file:
{
  "root": "docfolderwithsummary",
  "structure": {
    "summary": "summary.md",
    "assets": ".archbee/assets"
  },
  "autoMerge": false,
  "customJS":"",
  "customCSS":"* \n {  font-family: \"Comic Sans MS\", cursive, sans-serif; }",
  "footerTemplate": "",
  "headerIncludes": ""
}
Create summary.md file
We also recommend that you create a summary.md file. The summary.md reconstructs the document tree in the left navigation panel in Archbee. And it can help you organize your content nicely.
See an example of a summary.md file below:
- [Introduction](1.md)

## Table of contents

- [Init](init.md)
- [Configure App](config.md)
- [Config Database](config-database.md)
- [Config Redis](config-redis.md)
- [Config Elastic Search](config-es.md)
- [Swagger](swagger-v2.json)
When Archbee opens a pull request, it writes the navigation tree into archbee.json as structure.docsTree, and replaces a YAML config file with archbee.json. From then on, docsTree decides the tree in Archbee, and Archbee no longer reads summary.md.
Use Markdown syntax with GitHub
Some content blocks can be rendered if you are using specific syntax.
Check the Editor Markdown shortcuts to use these shortcuts.
Add multiple repositories
Follow these simple steps to add multiple repositories and sync them with Archbee:
Go to your GitHub account connected with Archbee, and then navigate to the Settings page.
On the left sidebar, look for Applications.
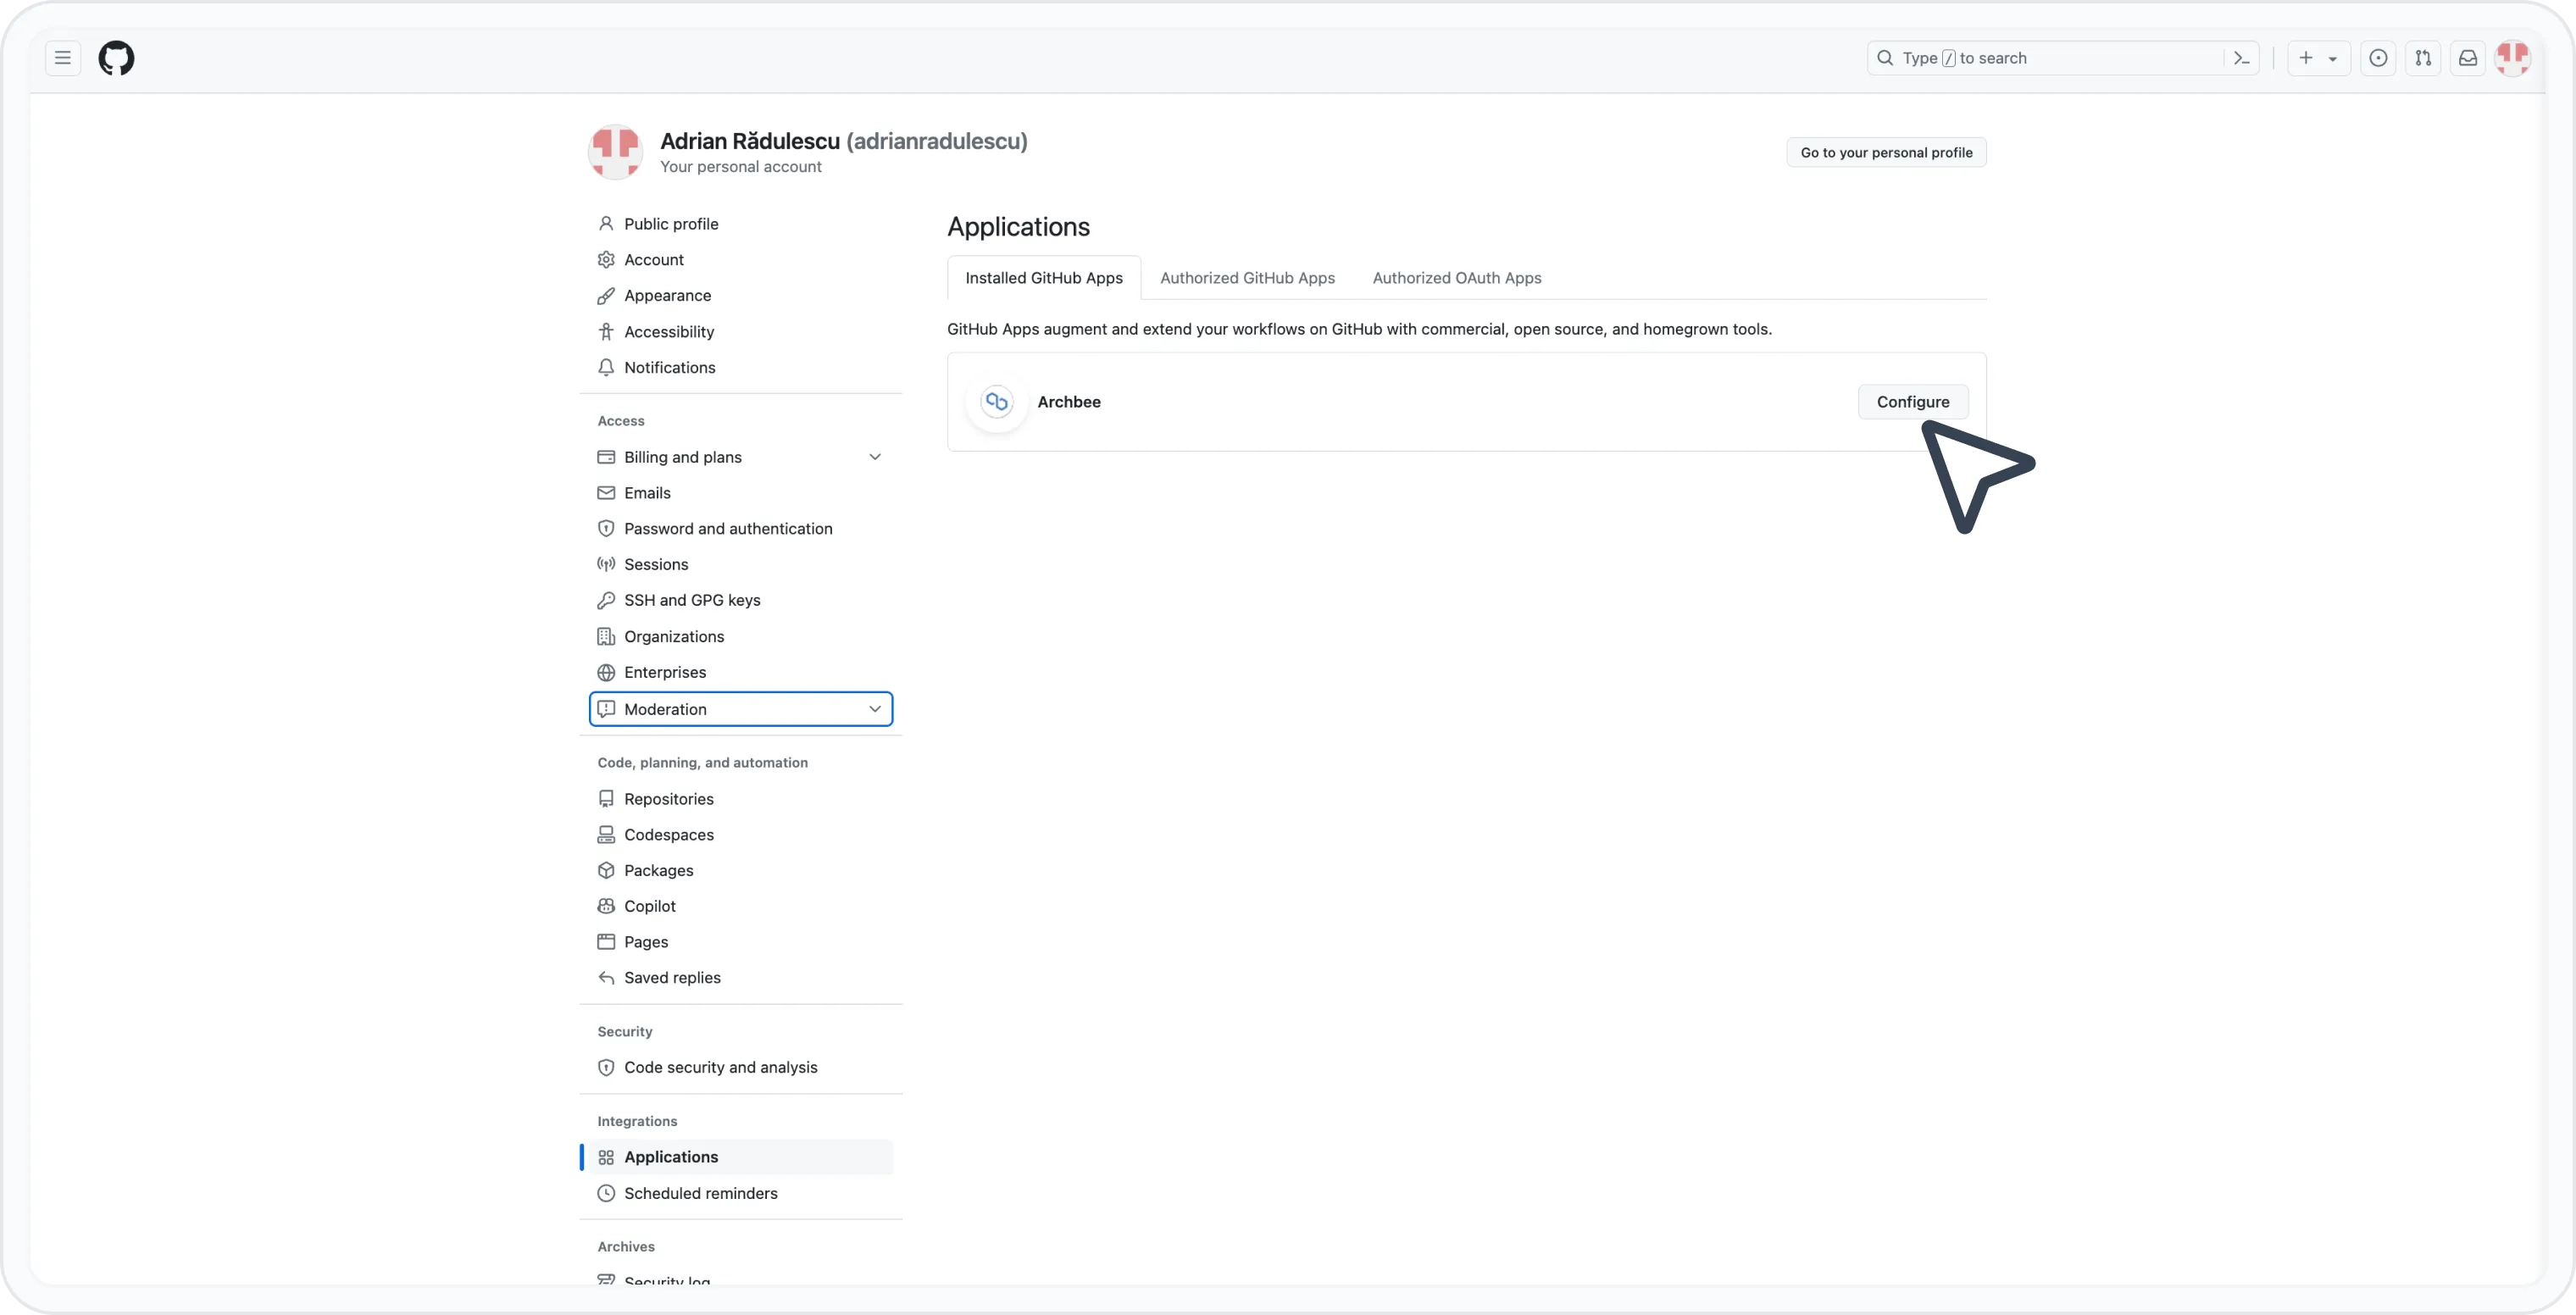
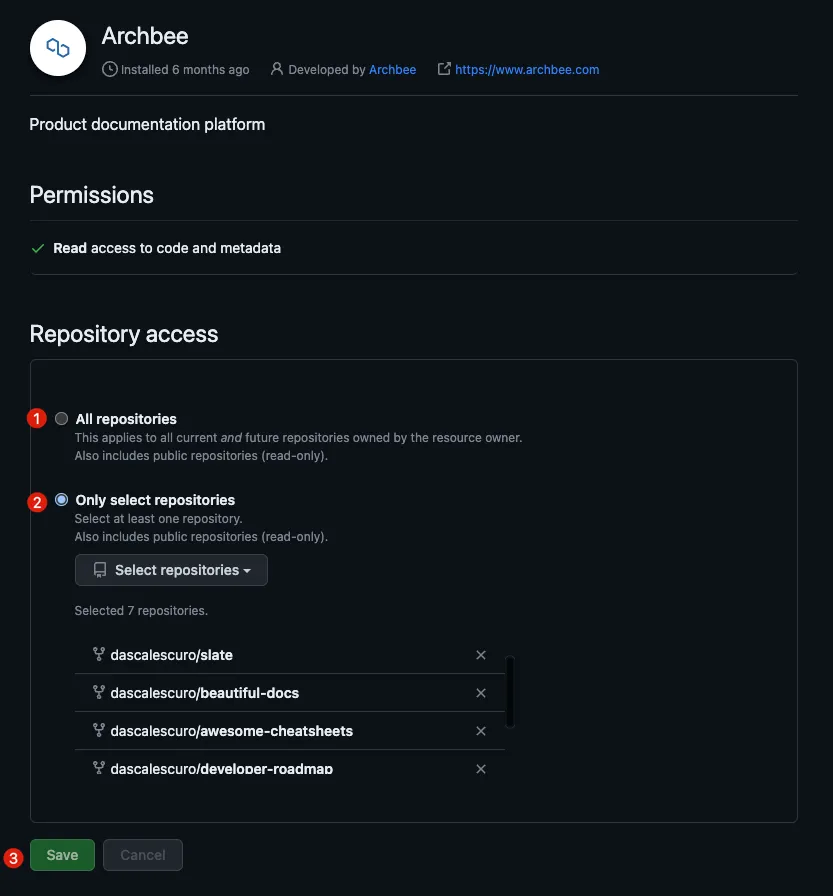
Click the Configure button and when the new page opens, provide access to:
- All repositories (this means that you can select any repo from your Archbee account)
- Only select repositories (select any new repository you want to sync with Archbee)
- Click Save
Go back to your Archbee account.
From the left navigation panel, create a new Space -> choose Write in GitHub and select the newly added repositories.
Import Open Api files
You can actually import Open Api files via GitHub. This feature works exactly like Importing OpenAPI / Swagger feature, including its settings. There are 2 important things to set up:
- paths to Open Api files (.json, .yml, .yaml) to be written in summary.md config file
- settings to be written in the config file under structure.docTreeOptions:
docsPath: ./myapp-docs
structure:
  summary: toc.md
  assets: assets
  docTreeOptions:
    openApiTryIt: false
    showDownloadOpenApiFile: true
    shouldCreateSchemaCategory: true
    shouldCreateIntro: true
    openApiLanguageExamples:
      - value: python
        label: py
      - value: javascript
        label: js
footerTemplate: ""
headerIncludes: ""